Sunday, September 22, 2019

Engaging Letter and Letter-Sound Activities

When it comes to teaching letters and the sounds they make, there are lots of fun things you can do in the classroom to keep it engaging. Each year in kindergarten, we get kids who have a variety of experience with the alphabet. Some know all of their letters and sounds, some know the letters in their name, and some have minimal experience with the alphabet. It is our job to meet children where they are and help them get comfortable enough with letters and sounds that they can begin combining letters to make words. Here are some ideas for things you can do in the classroom to reach all students:

Start with Names:

First and last names gives you the opportunity to introduce letters in a meaningful context. Kids love playing with their names and comparing them to their friends names. One of my favorite ways to do this is by making a name chart. Sorting names by their first letter on a name chart will give your students a reference that they can use when reading and writing through the year. You can also make a chart that compares the amount of letters in their names. This helps students think about the difference between a letter and a word as well as recognize that words can have a different amount of letters and still be a word.  Some more fun activities for names include putting together name puzzles, building names with letter tiles, stamping names into dough, and picking a surprise letter and having the students do a thumbs up if it is in their name or a thumbs down if it isn't in their name. 

These fun stamps are from https://www.lakeshorelearning.com
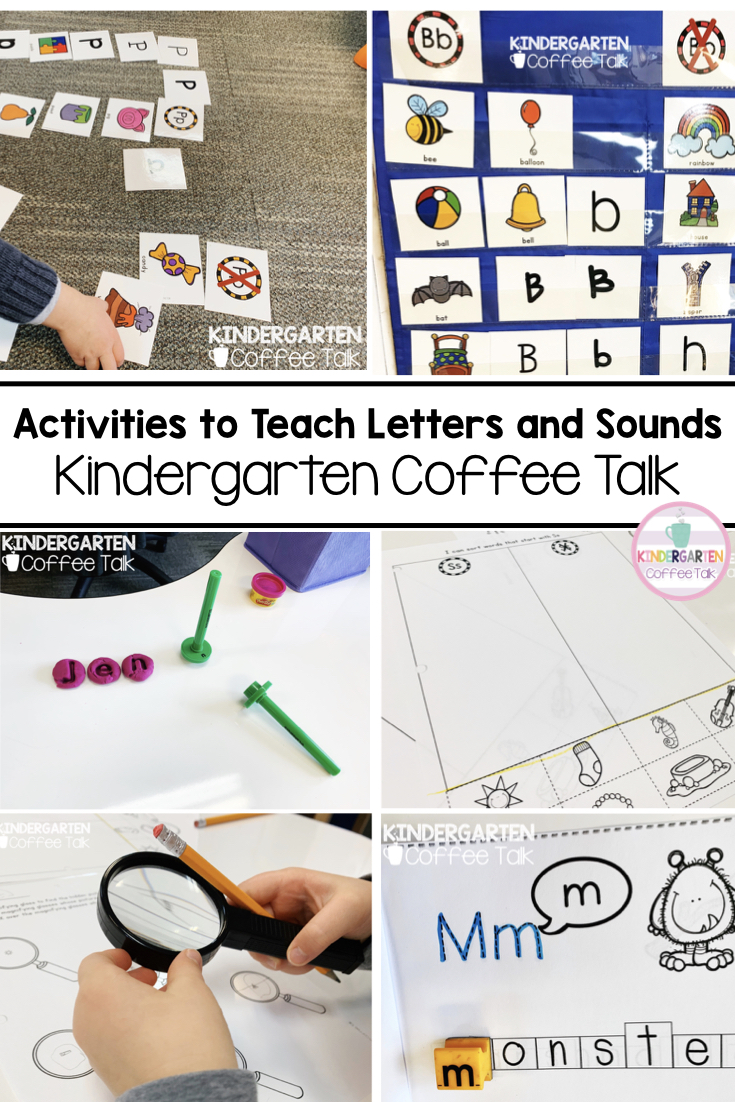
Sorting letters:

One of the first things we do when learning about letters is sort between the target letter and words that start with that letter and letters and words that don't start with the target letter. When we do this with multiple fonts, it helps students look at the features of the letter.  This is fun to do first in whole or small group and then it turns into a center. We like to pretend that we are letter detectives and "The Reading Detective Agency" has asked us to find a target letter and words that start with that letter in a group of letters and pictures.  The engagement is high and the activities are predictable so the kids can focus on the learning.  Its a win-win! 

This sort was done with the whole class:


Recently we have been adding movement into our lessons by having students hop, bear crawl, or crab walk to a card, bring it to the pocket chart, and then hop back to their spots.  Another option for this sort is to give students the cards and see if they can find the rule.  Below is a group of students sorting cards as a team:


 And this is a kiddo working independently to sort out letters:


We follow up the sorting activities with independent picture sorts in two ways so we can focus on words that start with the target letter.  The first way we sort is by keeping that detective theme and looking for pictures using magnifying glasses.  


We also do a cut and paste sort:


If you are interested in this resource, you can find it here in my Teachers Pay Teachers store.

I also like make these trace and stamp books with the kids.  We use my thin smelly markers for tracing and then we stamp the first letter.  After the kids make the books, I send them home so they can read them with their parents for even more letter practice!

Click here for this resource
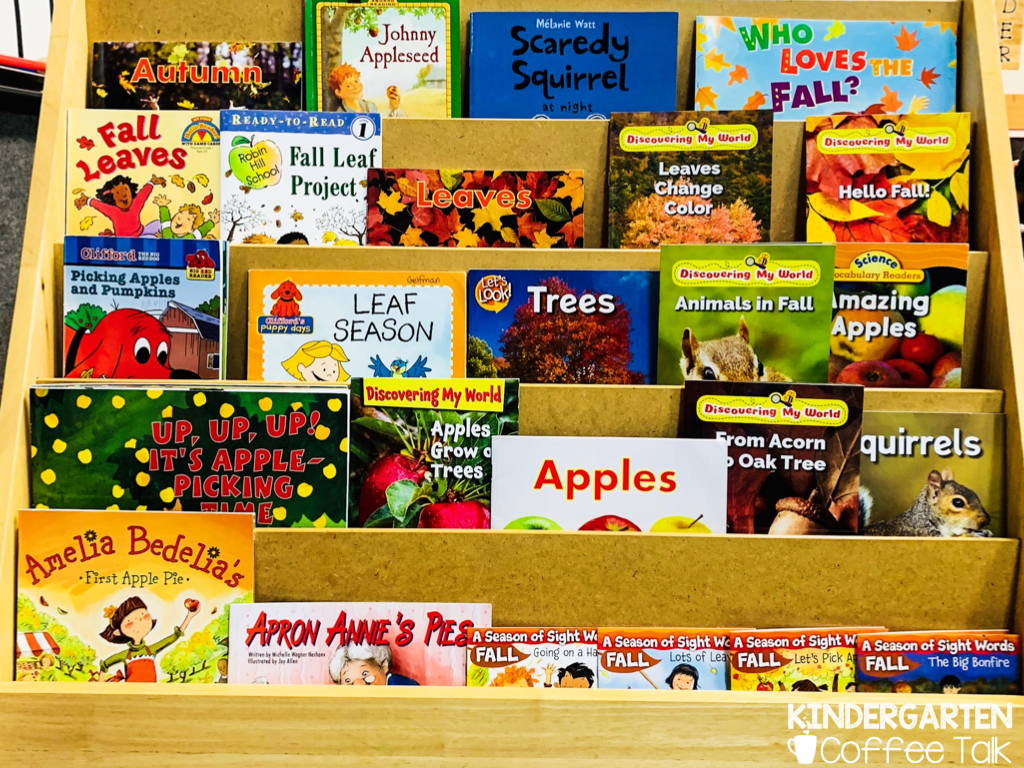
Alphabet books:

Reading alphabet books is another fun way to help students focus on letters and letter sounds. There are alphabet books for just about any topic and fun books about the alphabet. These are some examples, but by far not an exhaustive list of alphabet books. 

This is one of my favorite series where the characters are letters!  You can find it here 

Always a fan favorite! You can find it here 

A more traditional ABC book

Another great one! 

How do you like to teach letters and letter sounds in your classroom? I'd love to hear from you!


Happy Teaching!


Friday, February 15, 2019

Hibernation Inquiry


Have you read Jan Brett's new book called The Snowy Nap? It is about Hedgie (the hedgehog from The Hat) trying to stay up to see what his animal friends do during the winter before he hibernates.


If you haven't seen this book, you must check it out! Jan Brett's books and illustrations are always so captivating for kids and adults alike.  I love the little cut out pictures on the side and how you can talk about what is happening in the side pictures while the characters are doing something else in the story.  It is just great for developing executive function skills and theory of mind.  We loved using our retelling cards to retell and then act out the story.


Then, we couldn't forget our hedgehog snack! Each Friday we make a snack to match our theme... it gives us something to look forward to! We used pre-made sugar cookies, frosting, chocolate chips, and cocoa krispies. Didn't they turn out cute?


After reading The Snowy Nap, we had so many questions about hibernation.  {Which animals hibernate? Why do they hibernate? Where do they hibernate?} We did a little research to figure out our answers and then made a poster to teach others what we learned.  I helped by drawing some of the background and giving them pictures to color so that we could focus on interactive writing.  We used our favorite Kwik Stix paint for our mural. If you haven't tried them you must! They are paint sticks that dry in 60 seconds...amazing! If you'd like to try them, you can click here and use the code COFFEETALK10 for 10% off (affiliate link).


We also enjoyed reading A Time to Sleep to help us better understand the variety of the animals that hibernate and where they hibernate.

To answer the question "why do animals hibernate?", I froze blueberries in a container and asked the kids to pretend to be hungry bears and get enough berries to eat out of the ice.  They tried dropping the ice on the table to break it or digging the berries out of the ice, but they couldn't get enough to be full.  We left the frozen berries in the container overnight and observed that we could get all the berries out when the ice melted.


We made a bear paw for snack out of a graham cracker, Reese's cup, chocolate chips, and peanut butter. 


Do you teach about hibernation in your classroom? What are your favorite activities and books?

Happy Teaching!


Saturday, November 10, 2018

Nocturnal Animals Research Project

Nocturnal animals are seriously fascinating for kindergarteners.   What kindergartener wouldn't want to stay up all night? Plus, we get to learn cool words like mammal and echolocation. We started our research project by sorting between pictures of nocturnal and diurnal animals (not pictured) and watching a video from the Let's Find Out magazine website from Scholastic.  I use those videos for EVERYTHING. They are just long enough to peak the kids interest and stir up a lot of questions.  With our interest peaked, we decided to focus in on bats and owls. Then, we labeled a bat as a group and then on our own.


After labeling a bat, we read through some non-fiction bat books that I have from Scholastic and National Geographic Kids. We used these to help us complete our can, have, are chart.


This chart was not completed in one session.  We started it and then added to it as we did more research. I love how kindergarteners can do research by looking at photographs in non-fiction books. My students were fascinated that bats eat so many types of food, even watermelon! 

Next step: learning about echolocation. This is always a fan favorite. We watch the episode from "The Cat in the Hat Knows a Lot About That" with bats that shows how echolocation works and then make our own bat ears. 


The kids wanted to be sure that they were using colors that made sense so they looked through the books to check. Then we simulated echolocation by rolling a ball to the wall and watching it come back to us while squeaking like a bat.


It wouldn't be a fun unit without a snack! We made bats with double stuffed Oreos, frosting, and decorative candy eyes. They turned out super cute! (full disclosure: this is not my hand... it is the hand of one of the speech pathologists at my school who is much taller than me and has longer arms to better take a picture...lol)


The kids were so excited about all of the things they learned that we made two posters to teach others what we learned about bats. We painted the background with tempra paint and then used our favorite non-messy Kwik Stix paint to make the bats, trees, and bat food. If you haven't tried Kwik Stix, I promise they will change your life! They are solid tempra paint sticks that dry in 60 seconds. Can we say game changer?
Bats during the day:
 Bats at night:

We compared and contrasted bats and owls and made another can, have, are chart to help us organize our thinking.

We labeled and owl and then we made an owl snack. To make this snack you will need graham crackers, marshmallows, m&ms, and candy corn.


What activities do you do during your nocturnal animals unit?

Happy Teaching!

Saturday, October 27, 2018

Apples and Pumpkins Unit

Hi everyone! I’m back with a blog post about our most recent unit in my classroom. We have been talking about apples and pumpkins. This unit is one of my favorites (I think I say that about all of the units we do, lol). I like to start with apples towards the end of September and then move into pumpkins at the beginning of October.

We always like to start a unit by talking about our schema and asking questions about a topic. I like to make sure my bookshelf is stocked because looking through books always helps us come up with more questions. So many of my books are from Scholastic Book Clubs, but when I don’t have enough books about a topic, I go to the library and grab some more.


During our apple unit, we read books about apples, talked about the apple life cycle, dissected apples, labeled them, and taste tested different color apples. Then we made an apple pie in a cup!


Our favorite part was smashing graham crackers with a toy hammer!


After we learned about apples, we began learning about how pumpkins grow, pumpkin features, and things we could make with pumpkins. I always like to start this unit in early October so we can carve our pumpkin and watch it decompose throughout the month! So spooky!

The can, have, are thinking map is one of my favorites. We talk about how we can make sentences about pumpkins using those words.


We studied the outside of the pumpkin and made predictions about what would be inside. When we check to see if it would sink or float. To most kids surprise, it floated!


Then, we talked about how we would carve a pumpkin. We sequenced how to carve a pumpkin before we actually did it. This way the kids could direct me in carving the pumpkin based on what they knew from the sequencing work they have done.


These are part of my Sequence and Write: How to Carve a Pumpkin pack on TpT. If you are interested in getting these cards for yourself, you can find them here.

We put our pumpkins out in the garden next to one that we didn’t carve and made predictions about which one will decompose first.


Our unit wouldn’t have been complete without a food activity. We made a pumpkin patch with chocolate pudding, smashed Oreo cookies, candy pumpkins, and green Sour Punch Straws. You can find the original recipe here.


We also added some super simple fun fall activities to our workstations. The kids have been making pumpkins, pumpkin seeds, apples, and fall leaves on the light table.


We have also been using beads to build pumpkins and leaves on our mirrored tray (I found that at Target last year).


As Autumn is in the air, we have also been completing these fun Autumn themed activities from Education.com. Below is one example of a worksheet, but you can go check out their website for more fun activities and games!
Click here to get this worksheet and click here to get the answer sheet!


Happy Teaching!

Sunday, August 12, 2018

Math Interactive Notebooks in Kindergarten: Getting Started and Keeping it Simple


I love using math interactive notebooks in kindergarten. They are a routine that we establish early on that carries our learning throughout the school year. The first couple of weeks are slow moving, but once we get it a groove it is smooth sailing after that.

Getting Started:

To be honest, I have found two different ways to get started with interactive notebooks that have been quite effective for me. I choose between the two depending on the class that I have.

Option 1: I like to start my students doing a version of "workstations" early on in the school year. During this time, we play get familiar with our math manipulatives and I teach students about staying in one spot, voice level, and how to clean up neatly and completely before moving on to the next workstation. I also take this time to teach students about stamina and we start of at the workstations for about 5 minutes and start adding one minute a day as soon as they are ready. Once we get up to 10 minutes per station and the group is working at one spot with a level 2 voice level, I pull kids to my small group table and I guide them through cutting, gluing, and completing our pages. 

Option 2: We begin math notebooks together and I guide them through cutting, gluing, and completing the pages while using a document camera. 

But isn't it a lot of steps?

Yes, in the beginning, we take it slow. And when I say slow, I mean S-L-O-W! In my classroom, I use both community supplies and individual supplies in a pencil box. For interactive notebooks, we use pencil boxes (just a personal preference of mine- community supplies are great too). We practice getting out our pencil boxes, where we need to put them, and how we need to sit to get ready for math notebooks. In the beginning especially, I usually keep and pass out the notebooks. Later on in the school year, the kiddos can be responsible for that too. We also practice getting out our glue sponges and tidy tubs as well. If you have never heard of glue sponges, you MUST check out this post from Kindergarten Smorgasboard. Life changing...seriously! Tidy tubs are our trash collectors that are on our tables so that we don't have to get up to recycle any of the paper until we are done. Yay! 

Once we can do all of those things, we are ready to get started with the page. This is critical: I show the kids one step, stop, and then let them do it. We continue that until we have completed all of the cutting. This is often my stopping point for day one. Then on day two, we glue and do the page together the same way we did the cutting...step by step (anyone else singing New Kids in their head right now?).

A few more tips and tricks:

1. Have your highlighter and scissors ready. In the beginning of kindergarten, fine motor skills are at so many different levels. A highlighted line or a simple cut goes a long way. 

2. Glue sponges are the best for interactive notebooks! They keep the paper attached to the notebook. Glue stick glue just doesn't keep it attached for the whole year.

3. If you have multiple interactive notebooks, pick a color of duck tape for each type of notebook and put it on the spine. It is so much easier to organize that way!

4. Hot glue a piece of ribbon inside the back cover of the notebook to use as a bookmark. Then, minimal time is wasted flipping to the next empty page in the book. 

What do they look like?

1. My math notebooks are spiraled practice. Once we get in the groove, on Mondays we measure, Tuesdays we tally, Wednesdays are word problems, Thursdays are geometry, and Fridays we practice number sense. I love this because once the kids learn how to do each type of page, they can look at the page, know what to do, and get started right away. Each page has minimal steps... thats just how I roll. If it is too complicated or feels too much like an art project, I won't do it. Lol!

2. These struggling students and English Language Learners have done really well with these notebooks. They are concrete enough that they can complete even the word problems, but challenging enough to keep everyone learning and reviewing information. 

3. As the kids get in the routine, interactive notebooks take about 10 minutes. I fit them in at the end of my small group time before they go to workstations.

A week of math interactive notebooks:

Here is what a week of math notebooks look like in my classroom at the beginning of the school year. The activities grow and change throughout the school year for spiraled practice.

Monday:


Tuesday:

Wednesday:


Thursday:


Friday:


Want to try some interactive notebooks?  Click here to download a whole week for free!


Any questions? Please feel free to email me. We LOVE interactive notebooks in our classroom and I hope you will too!
Happy Teaching!